
Streaming with OBS
The easiest way to get started with streaming is to use OBS, a free open-source video mixer application. If you are new to OBS, here are some quick steps to get you moving.
Once installed, open OBS and bypass any setup wizards.
Add a source like a Webcam (Video Capture Device) or drag a video file in.
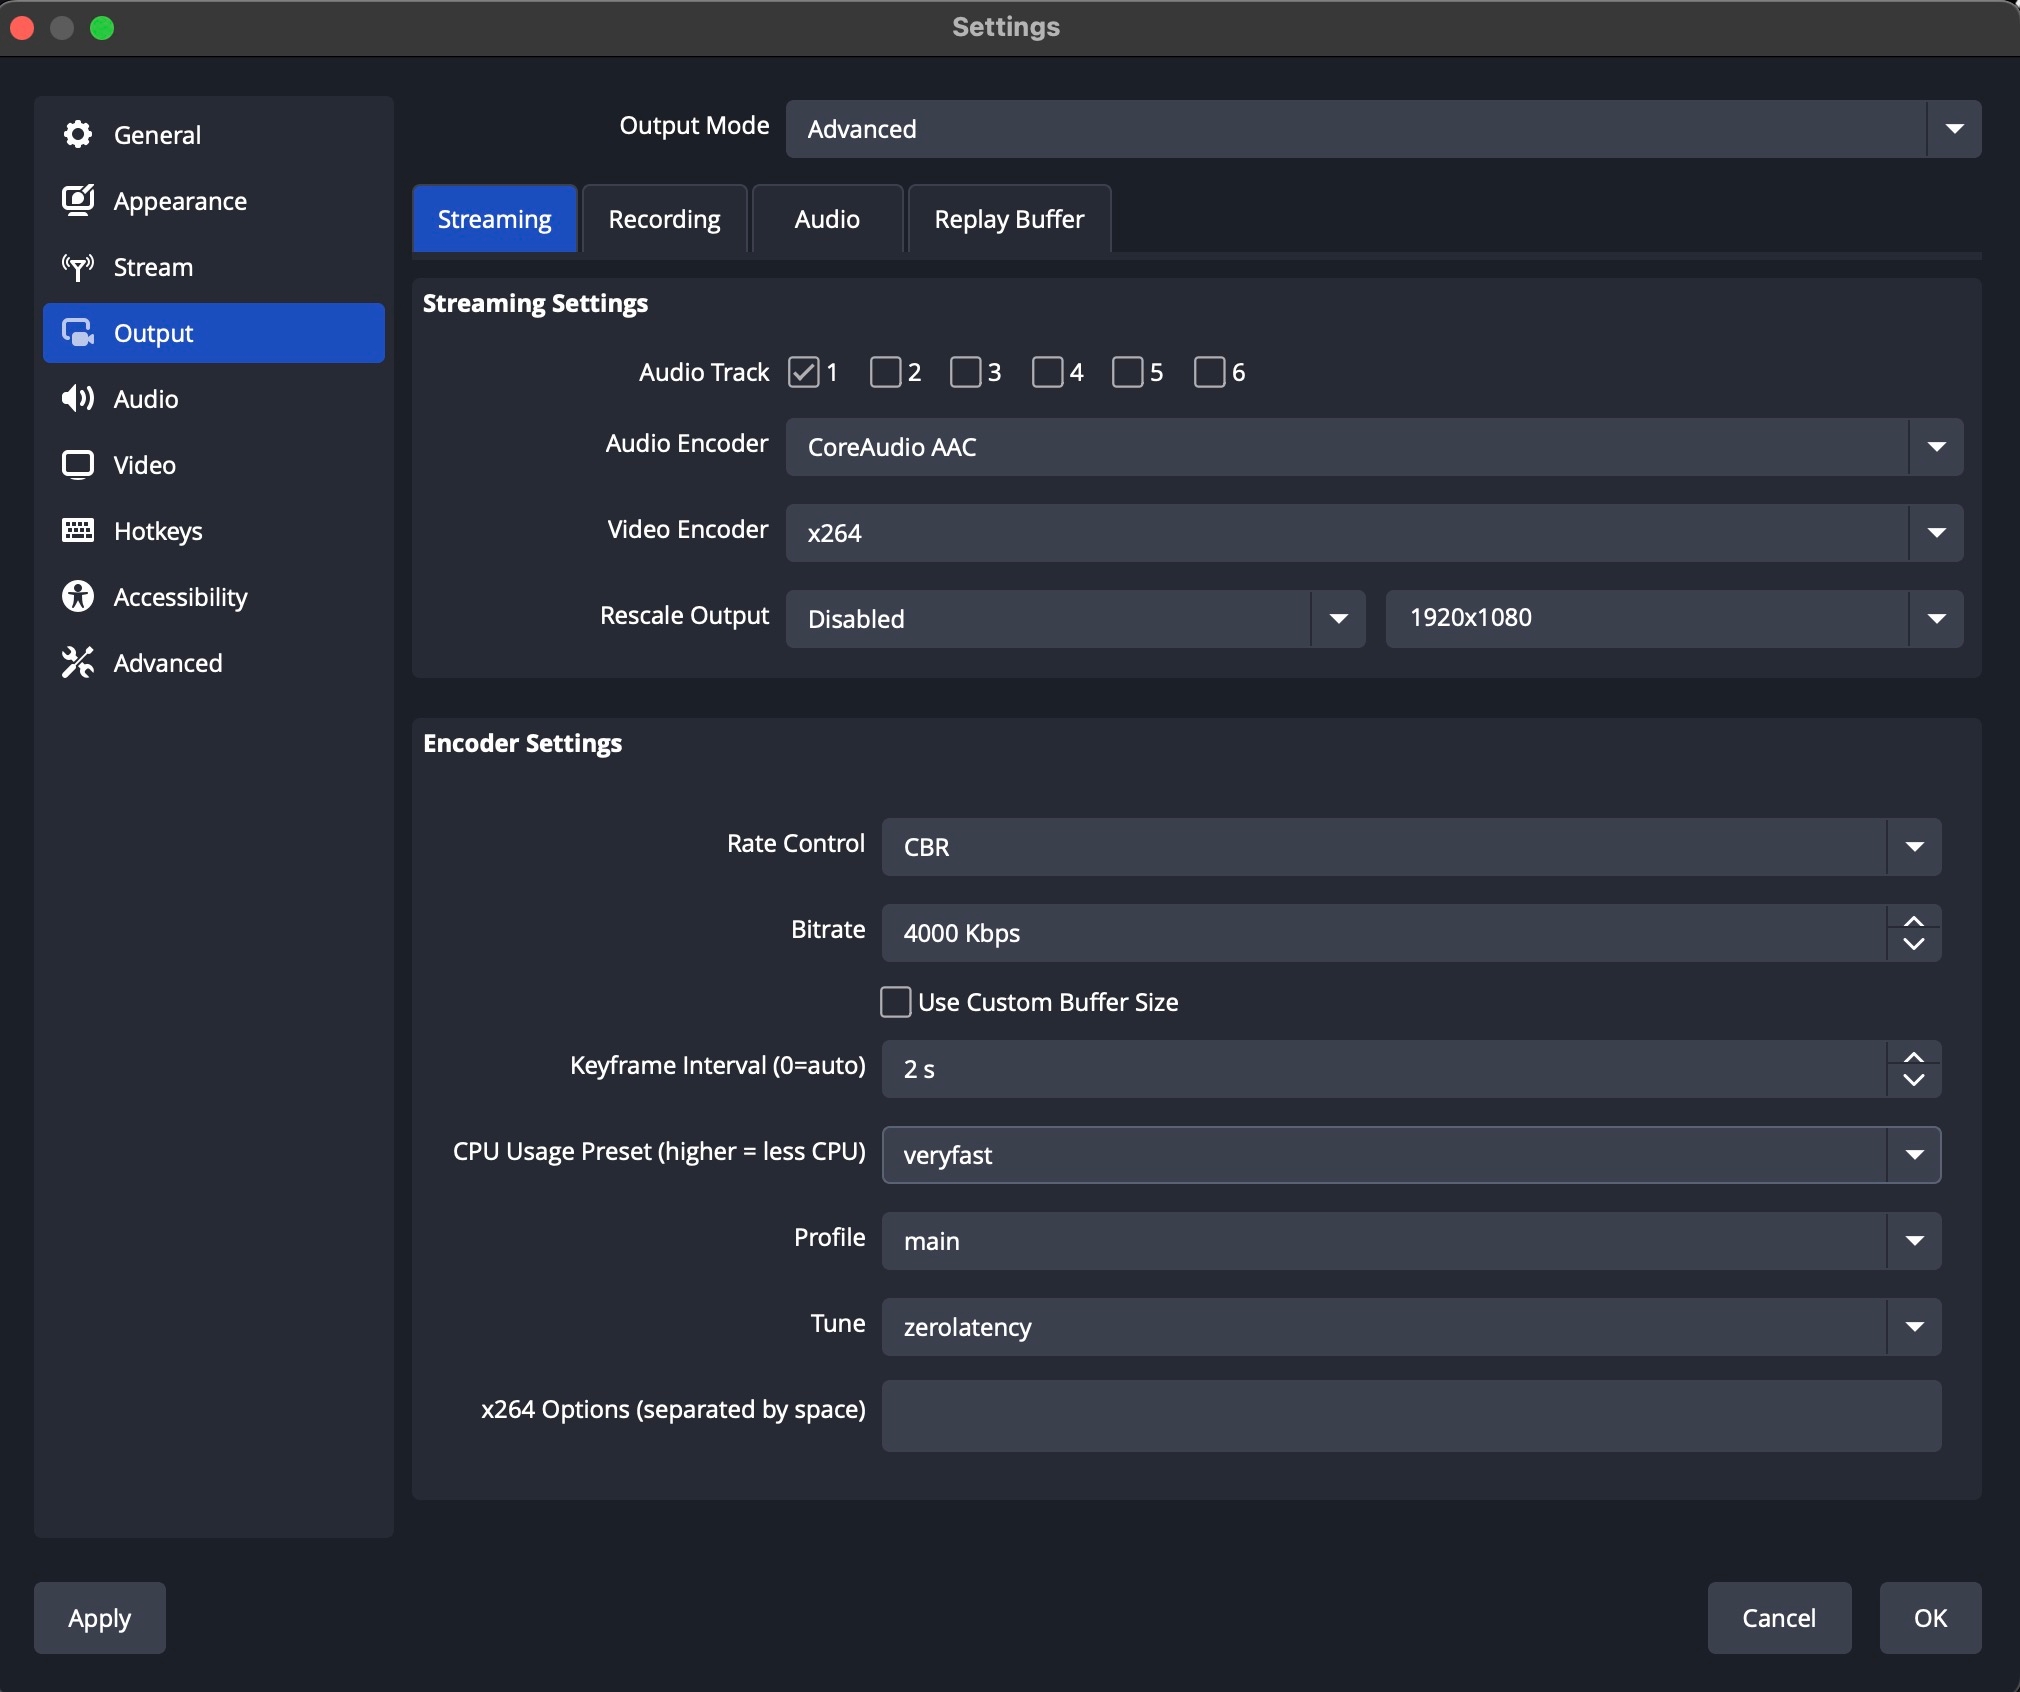
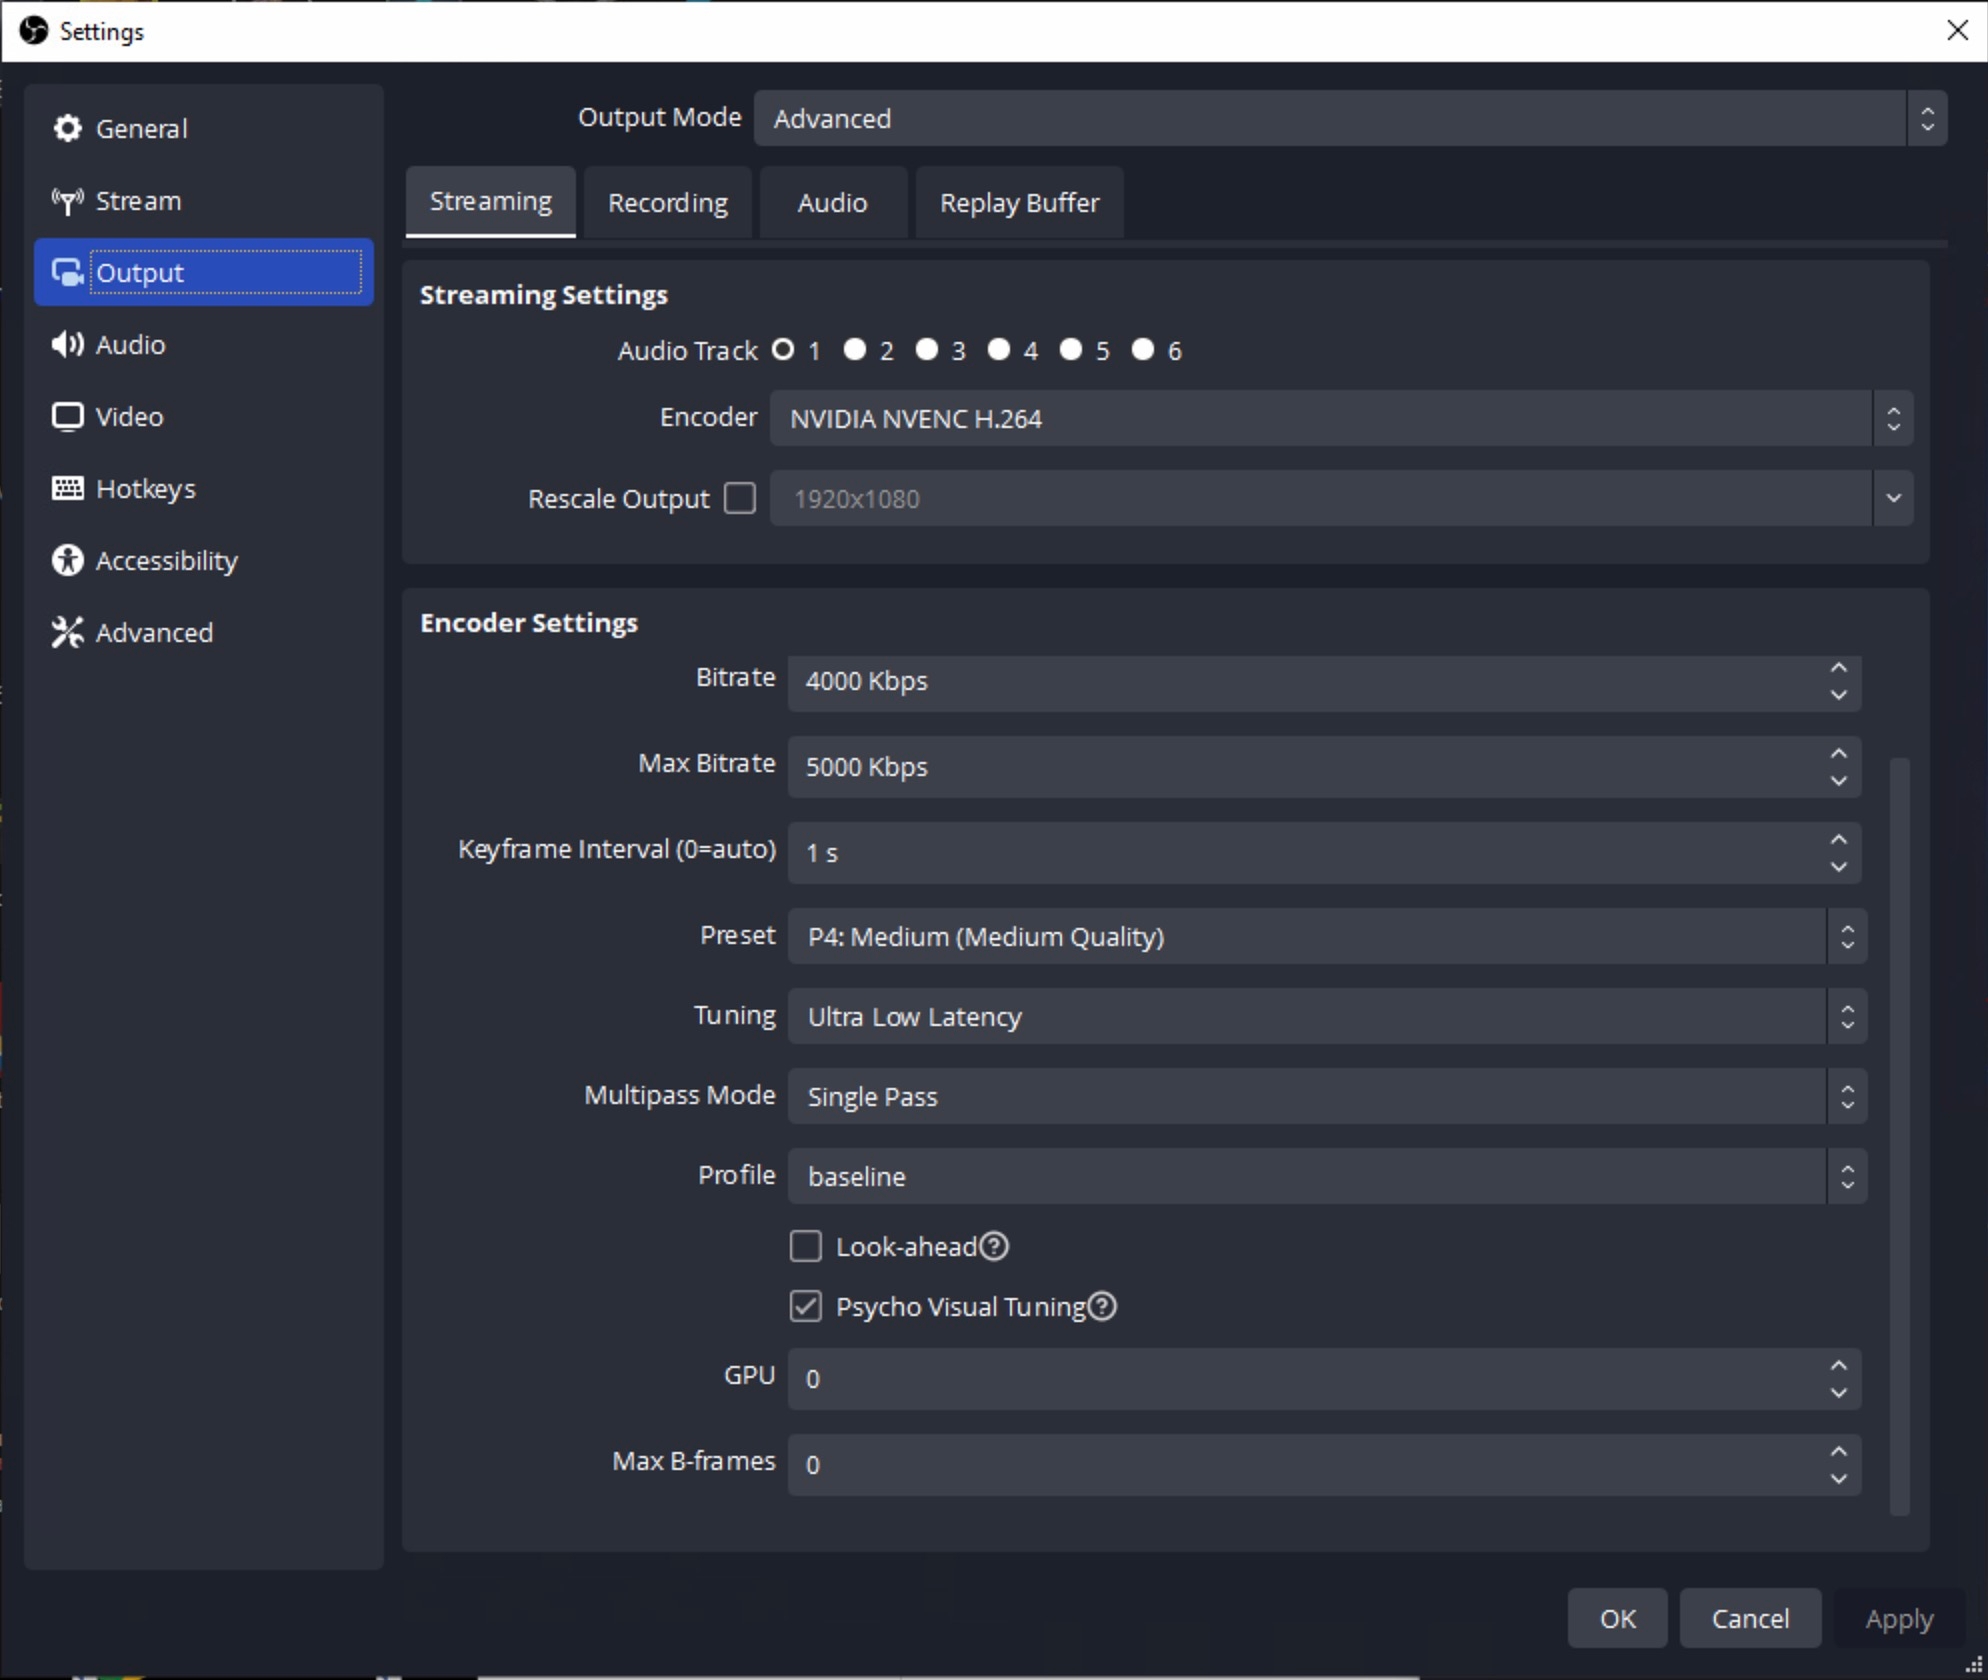
Click Settings => Output, and change the Output Mode to Advanced.
Set the Output options as shown below.
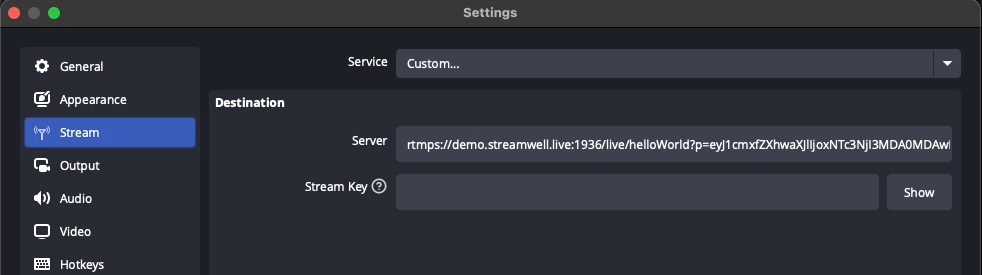
Click Settings => Stream, and set the Service to ‘Custom…’
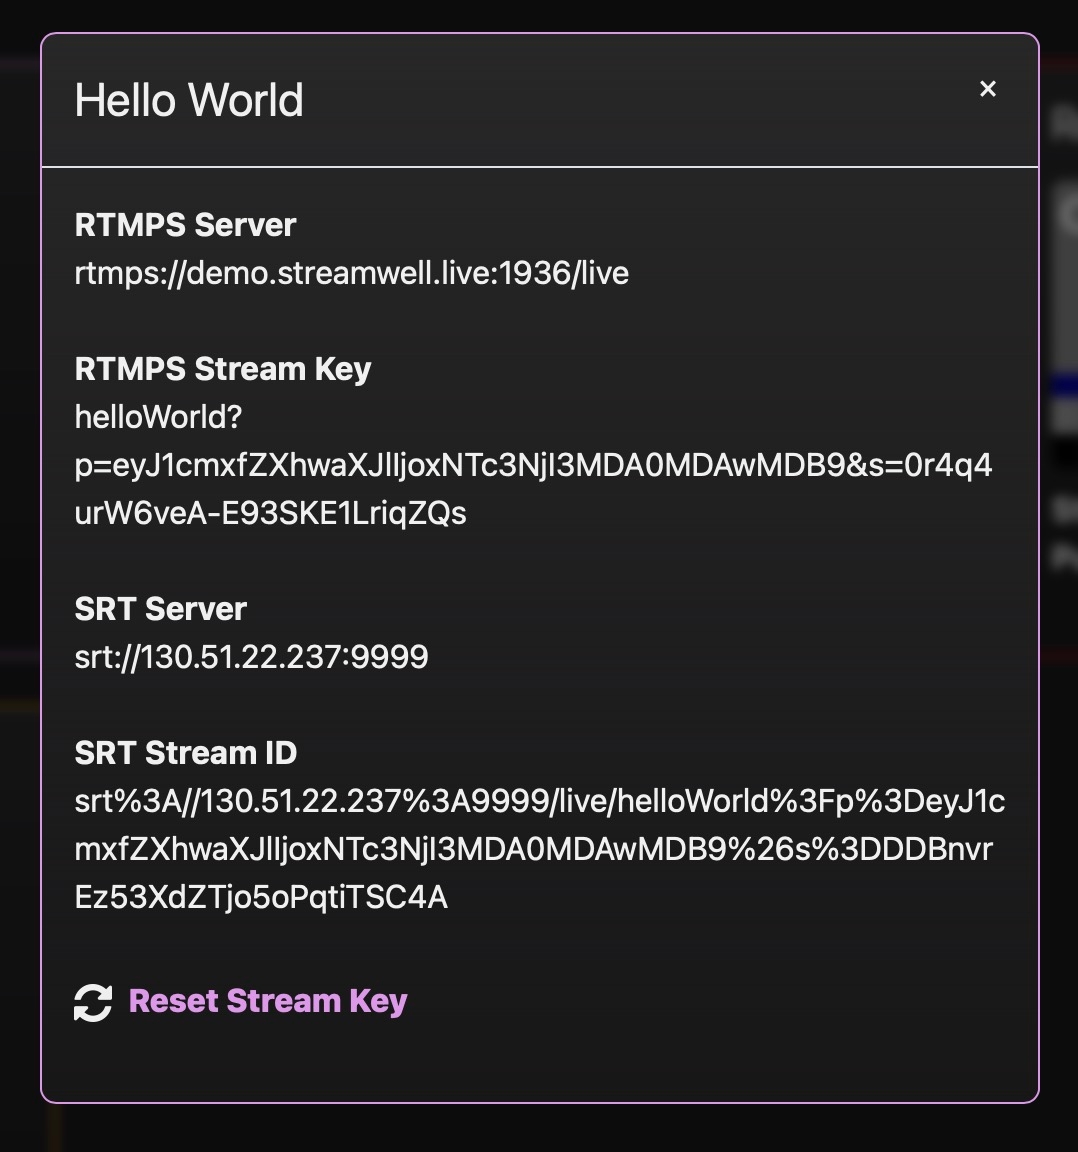
You can click 'RTMP', 'RTMPS', or 'SRT' to copy the full inbound stream URL and paste it into the 'Server' box in OBS. Or click the 'show' button next to the stream key which reveals the URL components already separated for an easy click-to-copy:
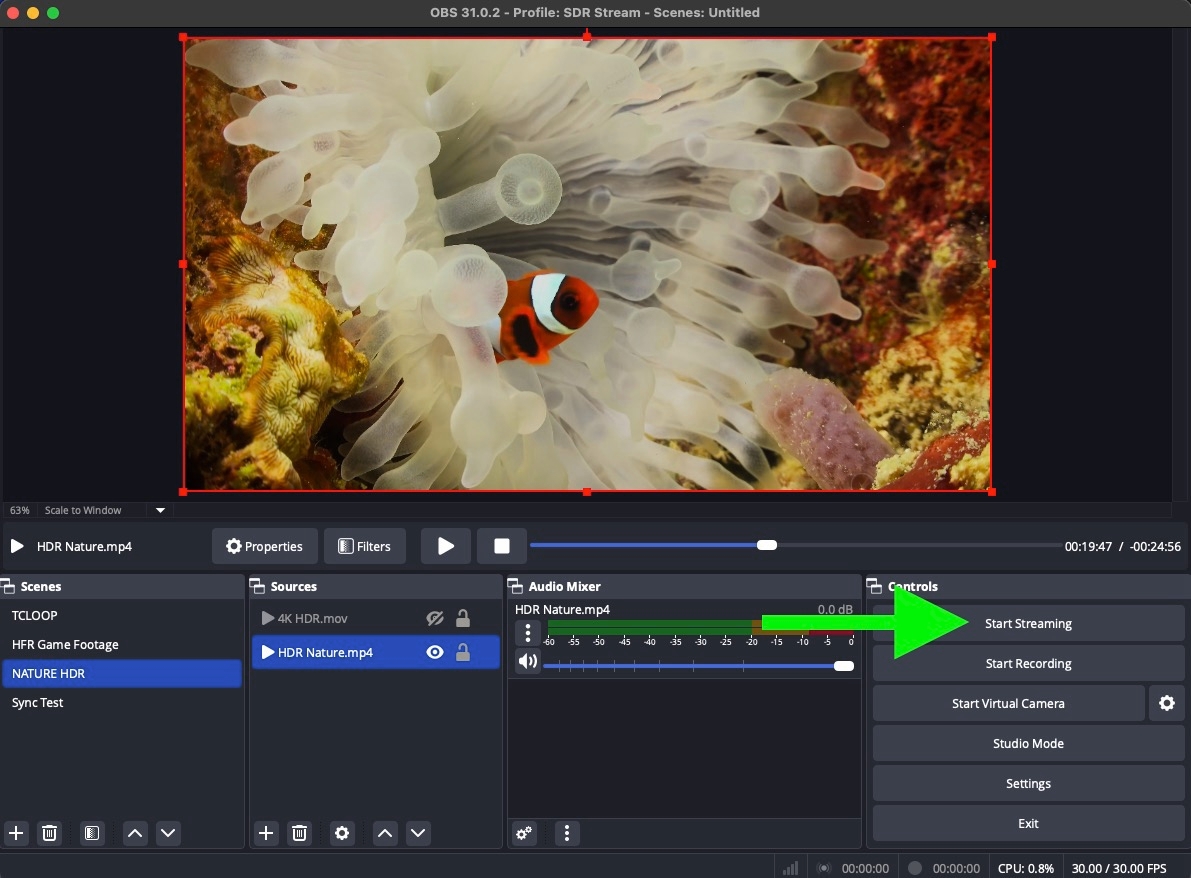
Click ‘Start Streaming’ and you should now be live - hello world!
Whether you are using OBS or another software or hardware encoder, always keep these requirements in mind for the sub-second latency streaming to function correctly:
AAC or OPUS audio
Keyframe interval of 1 or 2 seconds (higher intervals will cause playback issues and delays in starting playback)
No B-Frames (use of B-Frames will cause playback issues)
Use 'zerolatency' tuning option when available
Set up your Stream encoding settings under Settings -> Output (Advanced Mode)
If you have an NVIDIA GPU, you might see an option for the NVIDIA NVENC encoder which is great for handling the streaming workload without taking as much of your CPU.
On macOS, you might see an option for the Apple VT H264 Hardware encoder (a.k.a the "Media Engine"), another good option for offloading some of the encoding workload from the main CPU:
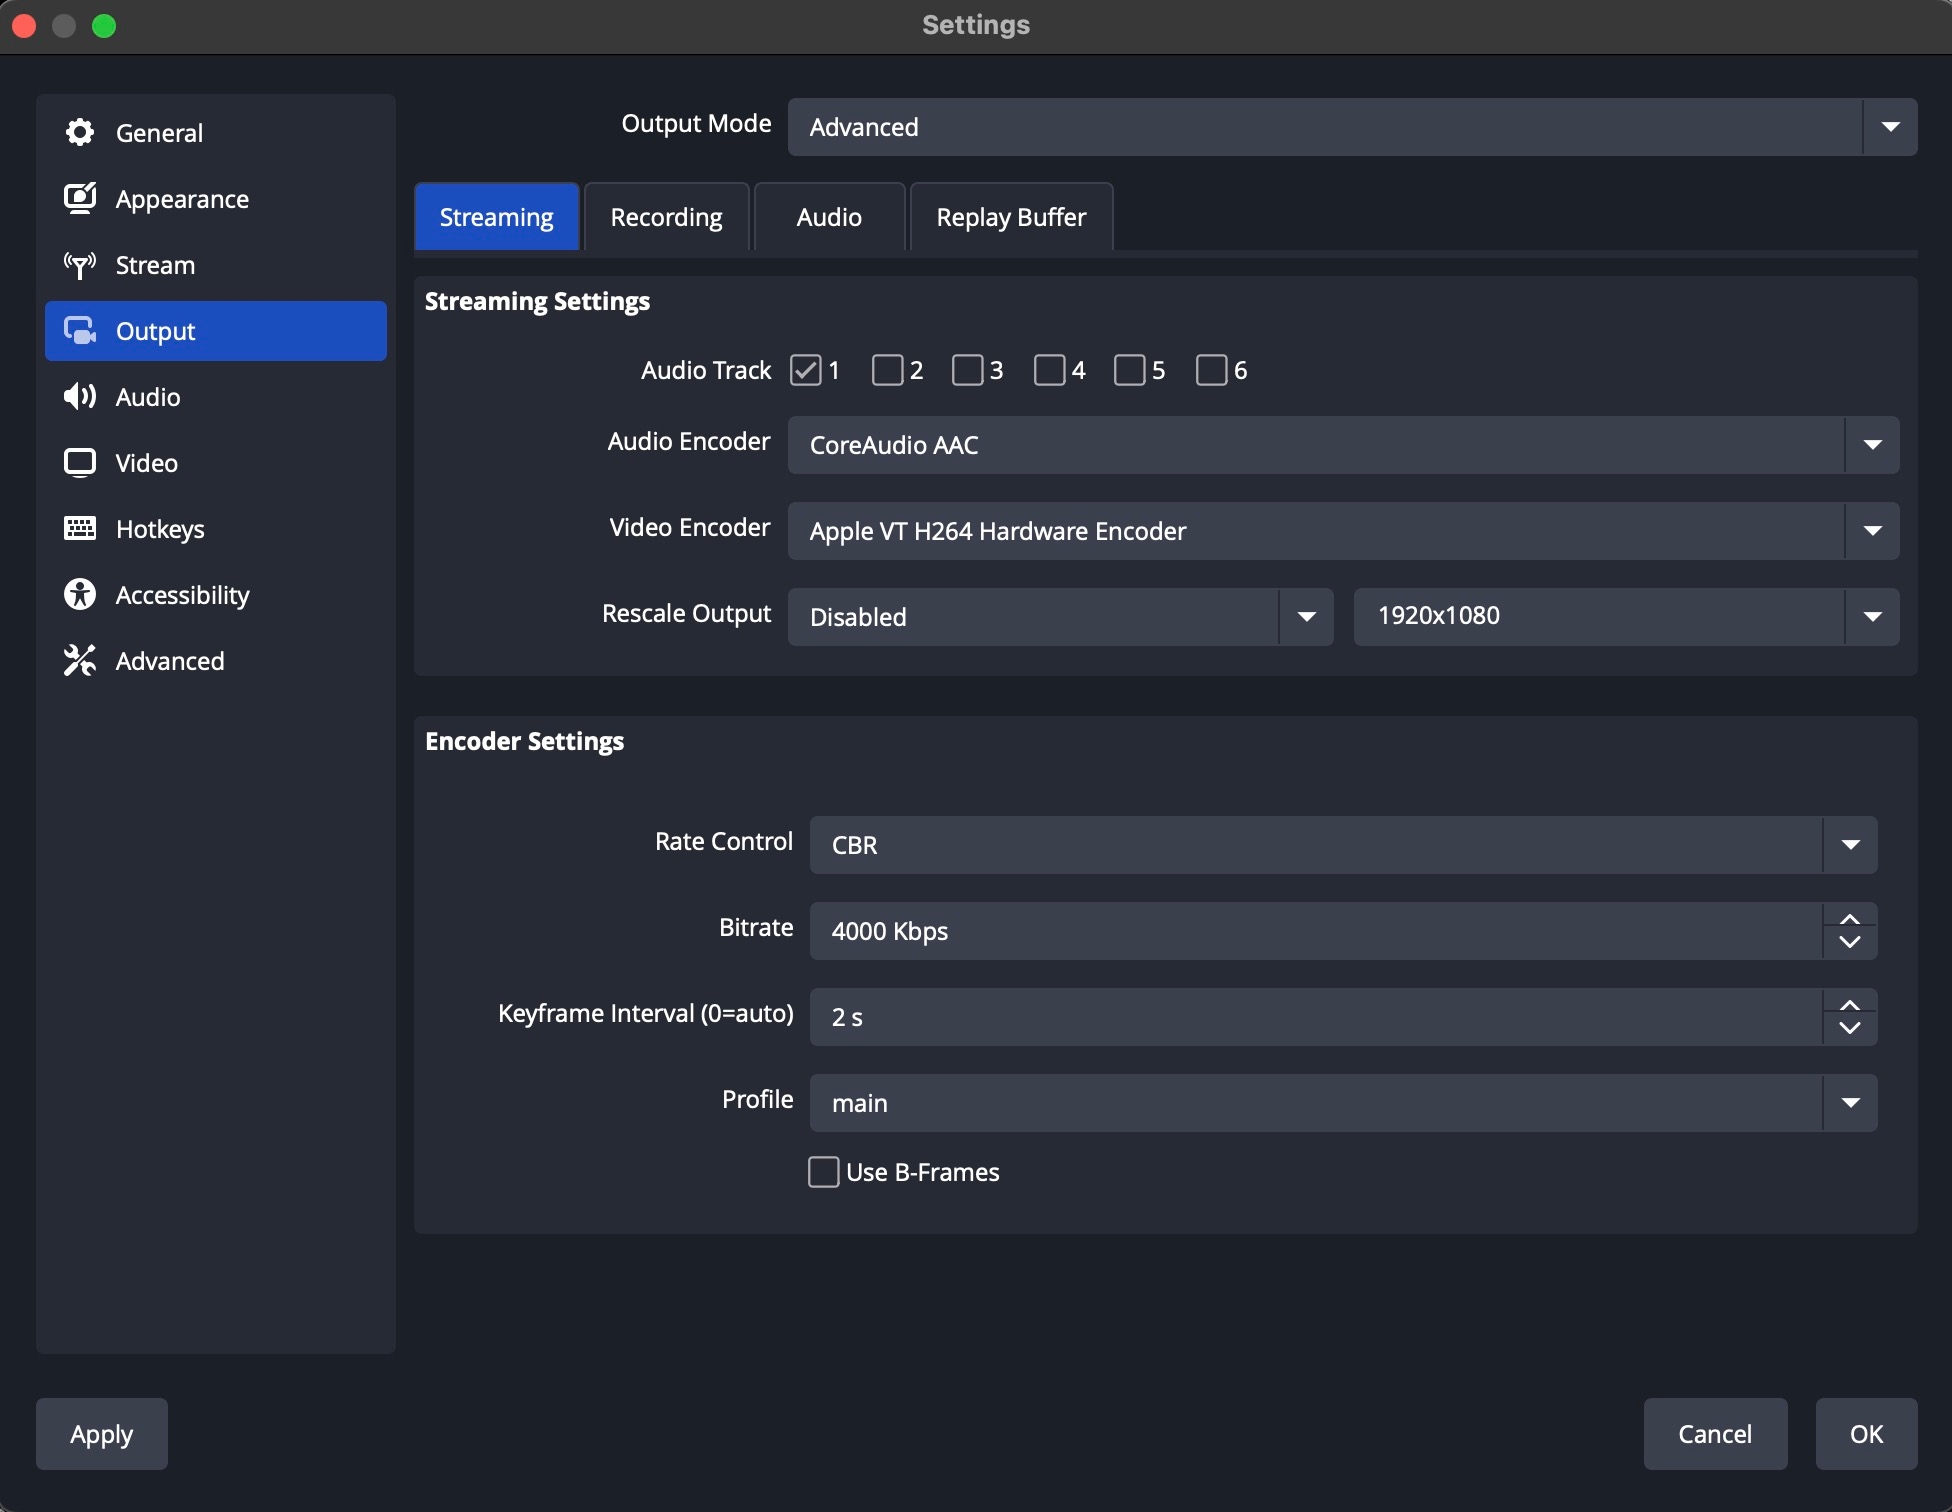
Note: If you are using the Apple Hardware encoder, certain system-level activities like transcoding / screen recording / sharing can interfere because they will always get priority over a live stream. If you need to use the "Media Engines" in your Mac for anything besides the stream, we suggest using the x264 software encoder for better stability.
You can change your Output Resolution and Frame Rate under Settings -> Video.
