# Streaming
Streamwell accepts RTMP, RTMPS or SRT input streams with **H.264 video** (up to 4K/60) + **AAC audio** (stereo or mono).
The most popular way to stream in is to use [OBS](http://obsproject.com), a free open-source video mixer application. If you are new to OBS, here are some quick steps to get you moving.
* Once installed, open OBS and bypass any setup wizards.
* Add a source like a Webcam (Video Capture Device) or drag a video file in.
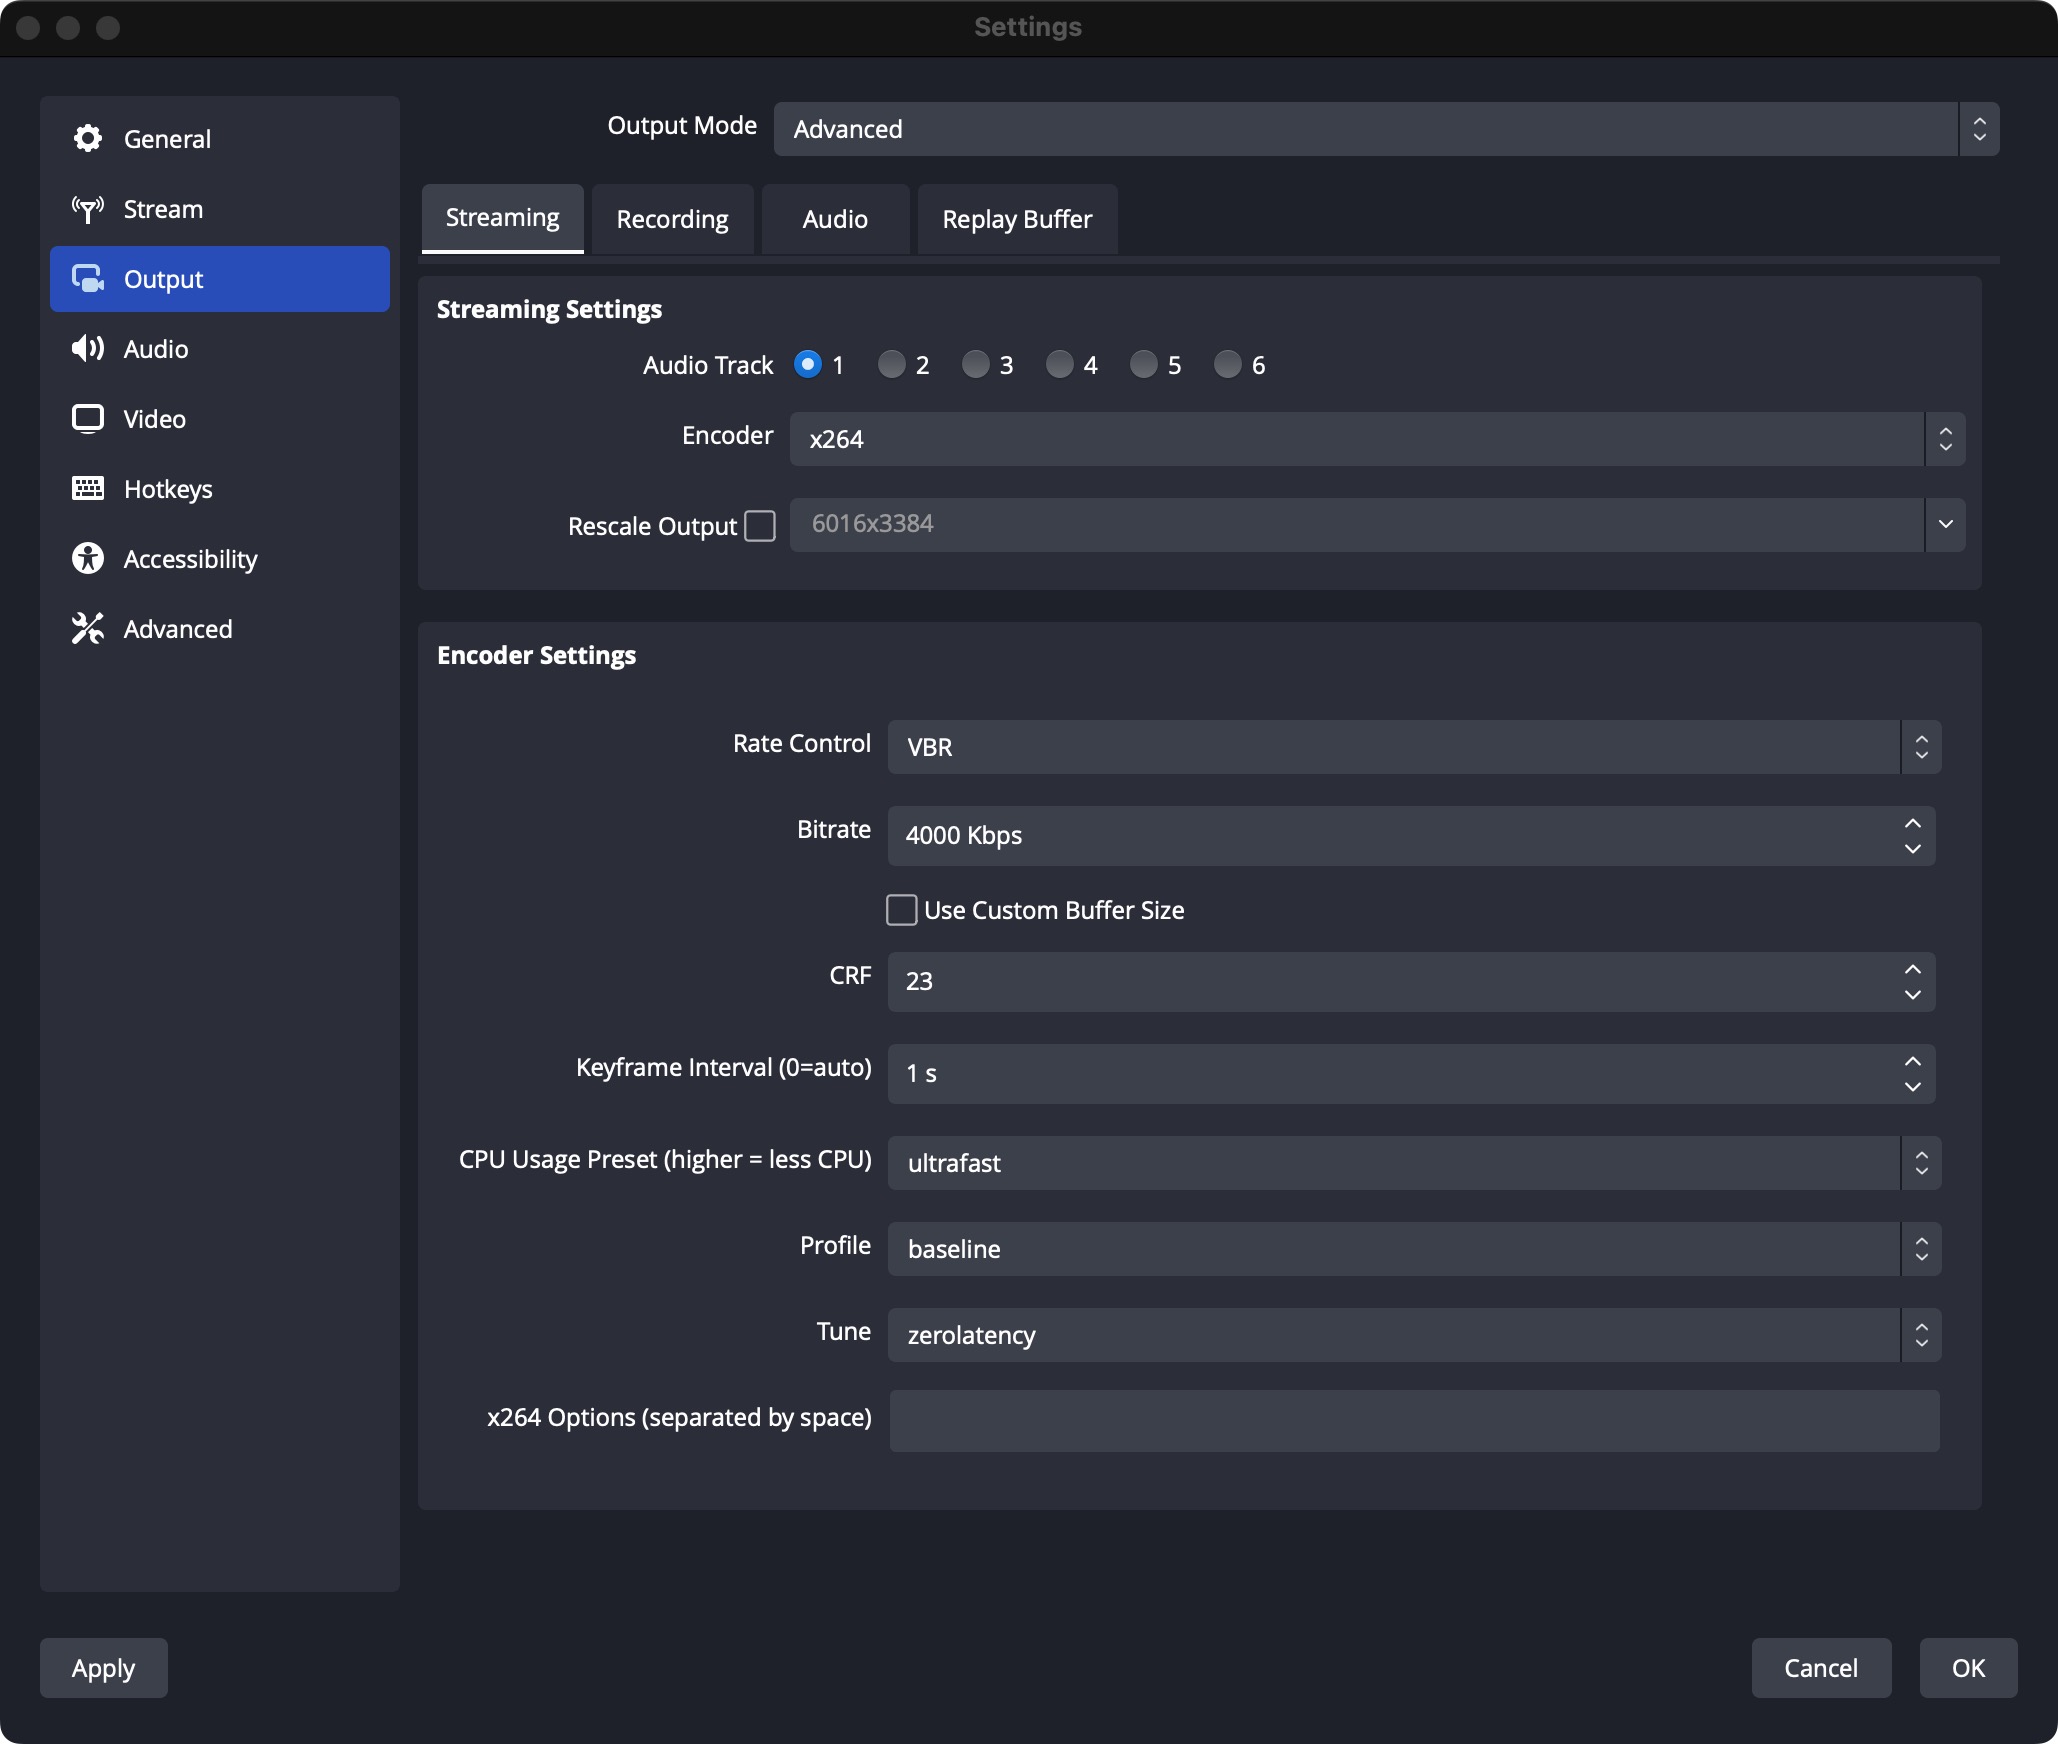
* Click Settings => Output, and change the Output Mode to **Advanced**
* Set the streaming options as shown below, or leave them as default if not shown (see below for more info on Streaming settings)

* Click Settings => Stream, and set the Service to ‘Custom…’
* Enter your Server URL under Server, and copy/paste a Stream Key of your choosing for the channel you’d like to stream to. For SRT URLs just copy/paste the full URL in the 'Server' field and leave the 'Stream Key' field blank. For RTMP URLs the server URL is everything up to and including 'live', and the Stream Key is everything after the slash (do not include the "/" in the stream key). Within each channel there is a 'show' button next to the stream key which reveals these components already separated for an easy click-to-copy:
Grab the full URL by clicking 'RTMP | RTMPS', or you can click to copy the server / stream key components individually.

* Click ‘Start Streaming’ and you should now be live - hello world!

Whether you are using OBS or another software or hardware encoder, always keep these requirements in mind for the low-latency streaming to function correctly:
* H264 Encoder (x264, Apple VT H264 Encoder, NVIDIA NVENC H264)
* Resolutions up to 4K, frame rates up to 60FPS
* AAC, OPUS or MP3 audio in **stereo** or **mono**
* Keyframe interval of 1 or 2 seconds (higher interval will cause playback issues)
* No B-Frames (use of B-Frames will cause playback issues)
* (Optional) 'zerolatency' x264 tuning option
* (Optional) 'baseline' or 'main' profile (avoid using 'high' profile)
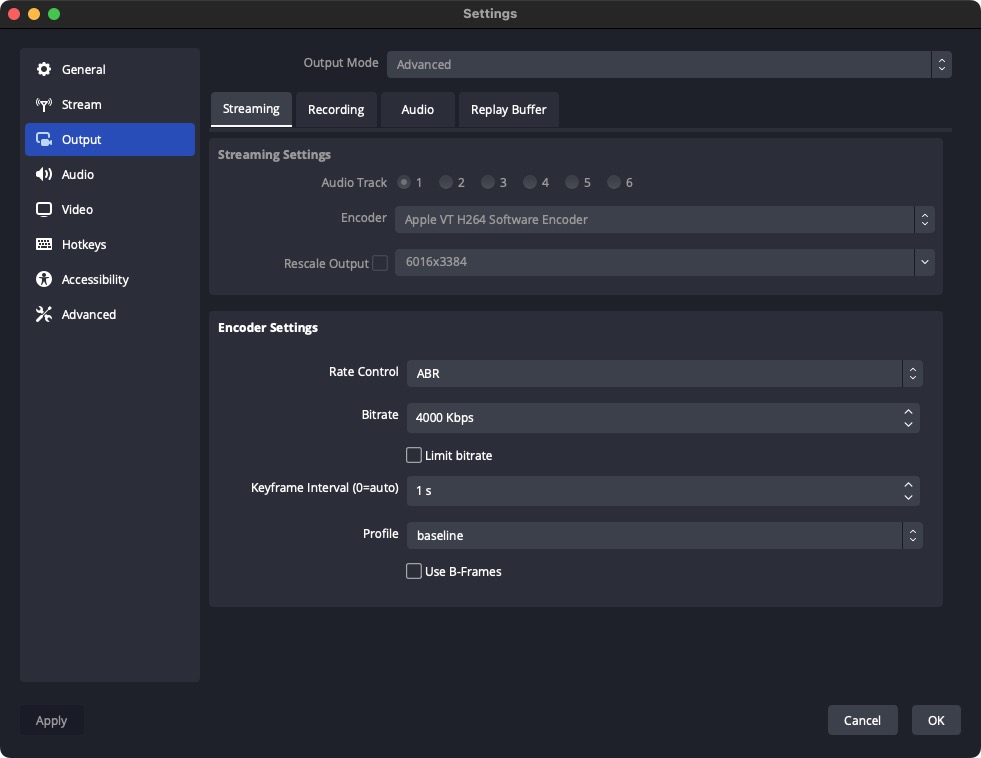
Set up your Stream encoding settings under Settings -> Output (Advanced Mode)
If you have an NVIDIA GPU, you might see an option for the NVIDIA NVENC encoder which is great for handling the streaming workload without taking as much of your CPU.
On macOS, you might see an option for the Apple VT H264 Software / Hardware encoder, another good option for offloading some of the encoding workload from the main CPU:
You can change your Output Resolution and Frame Rate under Settings -> Video.
### Choosing the Right Bitrate
Streamwell can handle incoming stream bitrates of **100Mbps** or more. However in real-world scenarios you need to consider your network capacity, number of viewers and what their internet connectivity will be like.
Here are some recommended bitrates depending on resolution and frame rate. Start with these and move up or down to suit your use case. Each 8000 Kbps / 8Mbps represents a real-world speed of one megabyte per second of video per viewer.
**1080p**
24/30 fps : *4000 Kbps* (recommended for best results)\
60 fps: *6000 Kbps*
**720p**
24/30fps: *2500 Kbps*\
60fps: *4000 Kbps*
**4K / 2160p**
24/30 fps: *12000-16000 Kbps*\
60fps: *20000-24000 Kbps*
If you are using *Streamwell in the Cloud:* while your server is licensed up to 25 or 100 viewers it also comes with a maximum guaranteed thoughput based on a data rate of 4000 Kbps / 4Mbps per viewer. Streaming ultra-high bitrates that go beyond your maximum speed (100Mbps for 25-viewer plans, 500Mbps for 100-viewer plans) could violate the fair-use terms which may cause your server to be shut down unexpectedly.
### Improving Colour Output
Under Settings -> Advanced -> Video, the default colour format of NV12 is optimized for streaming but is not very accurate. This can be improved by switching the colour format to i444, and making sure the colour range is set to 709 Full. This will result in increased CPU / GPU usage but if colour accuracy is a concern, you are likely on a powerful enough rig already.
### **NDI**
For editors and creative professionals using software like Adobe Premiere or Final Cut Pro, see [Streaming with NDI](https://docs.streamwell.net/streamwell-v1.3.5/how-to-streamwell/streaming/streaming-with-ndi) for a step by step tutorial on enabling NDI streams to Streamwell.